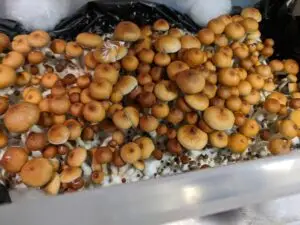
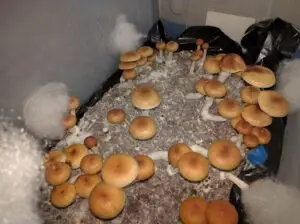
Growing mushrooms at home can be a fulfilling endeavor, offering the chance to cultivate and appreciate one of nature’s most intriguing organisms. Among the many strains, Golden Teacher mushrooms stand out for their unique golden caps and introspective experiences. This guide will walk you through the process of how to grow Golden Teacher spores, using key tools like mushroom spores and a spore syringe, ensuring your cultivation journey is successful from start to finish. Always check your local laws making sure you do not break any.
Understanding the Basics of Golden Teacher Mushrooms
Before learning how to grow Golden Teacher spores, it’s important to understand what makes them special. The Golden Teacher strain is renowned for its golden-colored caps and moderate potency. It’s favored not only for its mystical and enlightening effects but also for its ease of cultivation. Even beginners can successfully grow Golden Teacher mushrooms with the right techniques and tools.
Materials You Will Need to Grow Golden Teacher Spores
To start your journey of learning how to grow Golden Teacher spores, you’ll need the following items:
- Spore Syringe: The primary tool for inoculating the growing medium. A spore syringe contains millions of mushroom spores suspended in a sterile solution, perfect for introducing spores into a growth substrate.
- Sterile Substrate: A mixture of brown rice flour and vermiculite is commonly used as a growth medium.
- Jars with Lids: Wide-mouth mason jars work best for containing the substrate.
- Pressure Cooker or Steamer: For sterilizing the substrate.
- Gloves and Isopropyl Alcohol: To maintain a sterile working environment.
- Growing Chamber: A clear plastic container or terrarium to house your jars and mushrooms.
- Spray Bottle: Filled with water for maintaining humidity.
- Thermometer and Hygrometer: To monitor temperature and humidity.
Step 1: Preparing the Substrate
The first step in how to grow Golden Teacher spores is preparing the substrate. This substrate will serve as the nutritional base where the mushroom spores will grow and form mycelium.
- Mix the Substrate: Combine 2 parts vermiculite, 1 part water, and 1 part brown rice flour in a bowl. Ensure that the vermiculite is damp but not overly wet.
- Fill the Jars: Pack the mixture into jars loosely, leaving about an inch at the top.
- Seal and Sterilize: Cover each jar with aluminum foil and tighten the lid. Place the jars in a pressure cooker or steamer and sterilize them at 15 PSI for 60-90 minutes. Allow them to cool completely before proceeding.
Step 2: Inoculating the Substrate with a Spore Syringe
This is where the spore syringe comes into play. Using this tool ensures that the mushroom spores are distributed into the substrate effectively.
- Sterilize the Area: Wipe down your work surface and tools with isopropyl alcohol. Wear gloves to avoid contamination.
- Inoculate the Jars: Shake the spore syringe to evenly distribute the mushroom spores within the solution. Flame-sterilize the needle and inject approximately 1-2 cc of the spore solution into each jar, aiming for four injection points around the sides.
- Seal the Jars: Replace the foil covers to protect the holes from contaminants.
Step 3: Incubation Period
The incubation period is crucial for how to grow Golden Teacher spores successfully. During this time, the mushroom spores develop into mycelium, the vegetative part of the fungus.
- Temperature and Darkness: Place the jars in a dark, warm space with a consistent temperature between 75-80°F (24-27°C).
- Wait for Colonization: This process can take anywhere from 2-4 weeks. Check the jars regularly for signs of white mycelium growth, which indicates healthy development.
Step 4: Preparing for Fruiting
Once the jars are fully colonized with mycelium, it’s time to move to the next phase of how to grow Golden Teacher spores.
- Birthing the Cakes: Remove the fully colonized substrate from the jars and rinse them under cold water to remove any loose vermiculite.
- Dunk and Roll: Submerge the cakes in water for 12-24 hours to rehydrate. Afterward, roll the cakes in dry vermiculite for a protective layer that retains moisture.
- Place in Growing Chamber: Set the cakes on a piece of aluminum foil or jar lids inside the growing chamber.
Step 5: Fruiting Conditions
Ensuring the right environment in the fruiting chamber is critical for how to grow Golden Teacher spores.
- Humidity Control: Mist the inside of the chamber regularly and maintain a humidity level of 85-95%. The use of a hygrometer will help you keep an eye on these levels.
- Temperature and Light: The ideal temperature for fruiting is around 70-75°F (21-24°C). Provide indirect light for about 12 hours a day to mimic natural day and night cycles.
Step 6: Harvesting Your Golden Teacher Mushrooms
Knowing when to harvest is a key part of learning how to grow Golden Teacher spores.
- Observe the Caps: When the veil under the cap starts to tear, it’s time to harvest. This means the mushroom is mature and ready for collection.
- Harvest Carefully: Gently twist and pull the mushrooms from the substrate. Avoid damaging the remaining mycelium, as this could affect future flushes.
Common Questions About How to Grow Golden Teacher Spores
1. Can I reuse a spore syringe for multiple grows?
Yes, a spore syringe can be reused as long as there is remaining solution, and it has been stored properly. Always ensure that the needle is sterilized before use.
2. How do I prevent contamination when growing mushroom spores?
Sterilization is key. Ensure that your working environment, tools, and hands are thoroughly cleaned with alcohol. Using gloves and a face mask can further prevent contamination.
3. How long does it take to grow Golden Teacher mushrooms?
The entire process from inoculation to harvest can take 6-8 weeks, depending on conditions and any unforeseen challenges.
Troubleshooting Tips for Growing Golden Teacher Spores
- Contaminated Jars: If you notice green, black, or pink spots, discard the contaminated jar immediately. This is usually a sign of mold.
- Slow Growth: Check that the temperature and humidity levels are within the recommended range. Inconsistent conditions can delay mycelium growth and fruiting.
Final Thoughts on How to Grow Golden Teacher Spores
Growing Golden Teacher mushrooms can be an enriching process, providing you with a deeper understanding of mushroom cultivation and its rewards. By following this comprehensive guide on how to grow Golden Teacher spores and using tools like a spore syringe and sterile substrate, you can successfully cultivate mushrooms and enjoy the journey from spore to harvest. Remember, patience and maintaining a sterile environment are vital to your success. Enjoy the process and the unique experience that growing Golden Teacher mushrooms can offer!

